Deploying an Azure web app using Azure DevOps
In this post, we are going to deploy a web app built using Azure DevOps. For this post, I will be using the Azure DevOps project built using an Azure VM in a previous post. We will be using the same Azure VM agent to run the release pipeline and will create a new web app with an Azure SQL server connection to deploy the web app to.
Prerequisites
1. An Azure account (which you can create following the instructions on a previous post), with an Azure VM, configured as a build agent (which I configured and used in this previous post). We will use this account to create a new Azure web app resource to deploy the project to.
2. An Azure DevOps organization (which you can create following the instructions on this previous post), to create the sample project.
3. An Azure DevOps project with a successfully built build pipeline. We are going to use the PartsUnlimited project we built using an Azure VM in an earlier post that meets these criteria.
Steps
There are two main sub-tasks involved in this process. The first one is to create the Azure web app with an Azure SQL connection to deploy the web app. The second one is to create a release pipeline, configure it to get artefacts from the build pipeline and deploy those artefacts to the created web app using the release pipeline.
1. Creating an Azure web app to deploy the project artefacts.
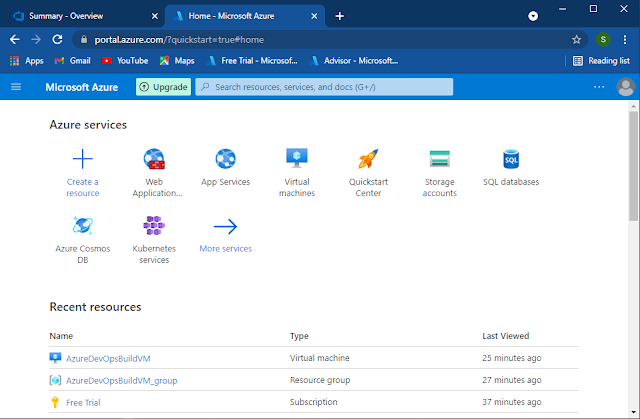
1.1. Navigate to portal.azure.com, and log in to your Azure portal. Click on the "+ Create a resource" in the portal home screen.
1.2. In the following create resource page search "web app + sql", and click the "Web App + SQL" resource.
1.3. In the following "Web App + SQL" resource page, click "Create".
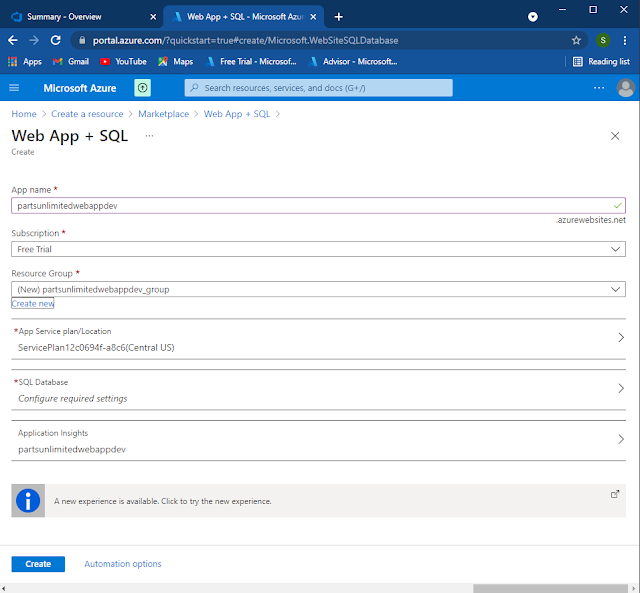
1.4. In the following create resource page, give an App name, and select or create a new resource group for the web app resource. After that click on the "SQL Database" line to configure the database instance.
1.5. Next give the database a name in the following screen, and click on "Select Server" to create a new database server for the database.
1.6. In the following "New Server" creation page, give the database server a name and admin credentials. After providing the necessary data, click on "Select". This will send you back to the screen shown in step 1.5, where again you have to click "Select" as you have configured the database server.
1.7. After selecting the database and the database server information, you will be presented with the following screen from step 1.4 with the "SQL Database" field filled. Click "Create" on this page.
1.8. This will lead to a new notification mentioning "Deployment in progress..." as in the following screenshot. Click the "Deployment in progress..." link in the notification.
1.9. You will see the following page with the deployment progress.
1.10. Following page will be shown when the web app deployment completes. Click "Go to resource" to see the created web app resource.
1.11. Following the resource view of the created web app resource. Here you can see the URL field which shows the URL to publicly access your web app. Before accessing this URL, we will make some changes to the web app's configuration to get it ready for PartsUnlimited web app deployment. To access configuration click on the "Configuration" under the "Settings" topic near the bottom left of the following screen.
1.12. Following is the configuration page of the web app. We are going to change the connection string name of the connection string shown at the bottom of the page.
1.13. Click on the pencil icon of the connection string line to edit it.
1.14. Rename the connection string to "DefaultConnectionString" and click "OK". This renaming is needed as that is the connection string name the PartsUnlimited artefacts are going to look for.
1.15. After renaming the connection string in the previous step, click "Save" on the following configuration page, to save the renamed connection string.
1.16. Click "Continue" in the next prompt to confirm save changes.
1.17. After successfully renaming the connection string, navigate back to the overview page shown in step 1.11, by clicking "Overview" in the left-hand side pane of the above screen. On the overview page click on the URL to access the hosted web app, and you should see a screen similar to the following screenshot confirming that the web app is ready for deployment.
2. Create and run an Azure DevOps release pipeline to deploy the web app.
2.1. Navigate to dev.azure.com, and navigate into your project with the build pipeline.
2.2. Navigate to the build pipelines page by selecting the pipelines icon (blue coloured icon) in the left-hand side menu and selecting pipelines, and make sure there is a successful build pipeline with a green tick to use for deployment.
2.3. Next we will navigate to the release pipelines page by selecting the pipelines icon (blue coloured icon) in the left-hand side menu and selecting "Releases" as shown in the below image.
2.4. This will lead you to the following screen where existing pipelines are listed. For this deployment, we are going to create a new pipeline. So click on the "+ New" and select "+ New release pipeline"
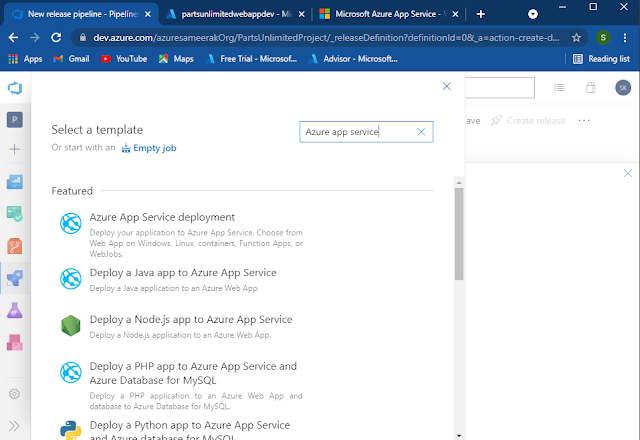
2.5. You will see the following screen to select a template for the new release pipeline. Here you will search "Azure app service" to find and select the "Azure App Service deployment" template (which is the first item in the list in the screenshot). Click the "Azure App Service deployment" and click "Apply" to start creating the pipeline.
2.6. In the following screen give the new stage a Name.
2.7. Next we are going to change the new pipeline's name.
2.8. Next, click "+ Add an artifact" in the Artifacts box.
2.9. In the resulting following screen select the successfully building build pipeline as the "Source (build pipeline)", and click "Add".
2.10. Now we have set the artefact source for the release pipeline. You will see a screen similar to the following screen with the selected build pipeline set inside the Artifacts box.
2.11. To configure the deployment configurations, click on the "1 job, 1 task" link in the Dev stage in the previous screenshot and you will see the following screen. In this screen select your Azure subscription (You might have to authorize it to be used with the DevOps account), and then select the newly created web app name from step 1.11 for the "App service name" field.
2.12. Next, click "Run on agent" in the above screen, and select the agent pool where the Azure VM agent used to build the source build pipeline is connected as the "Agent pool" as in the following screenshot.
2.13. Click "Save" in the above screen and add a comment to save the release pipeline with as in the following screenshot.
2.14. The next step is to run the created release pipeline to deploy the developed web app to the Azure web app resource. After completing the above step to save the release pipeline, the "Create release" button next to the save button will be enabled. Click the "Create release" button to get the following screen, and click "Create" to start running the release pipeline.
2.15. As a result of running the release pipeline, you will get a notification bar with a new release name (Release -1 in this case) as in the following screenshot.
2.16. Click on the release name link to see the progress of the release.
2.17. After some time the release stage will complete and you will see a screen similar to the following.
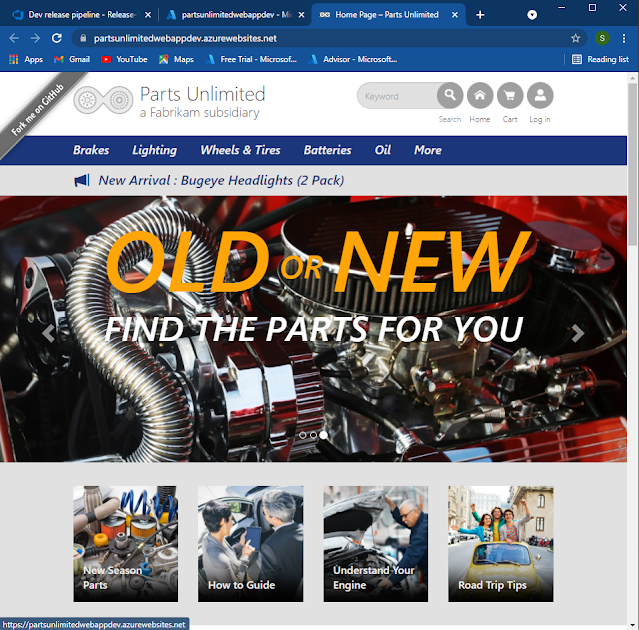
2.18. Now if you head back to the web app URL we opened in 1.17 and reload it, the newly deployed website content will be displayed as follows.
This brings us to the end of this blog post. There were several errors I encountered while preparing for this process, particularly related to not setting the connection string of the Azure web app resource the way PartsUnlimited web app expects it. The following troubleshooting section will list the errors I saw and how to locate the resolution.
Troubleshooting
This section contains the problems that might occur if the Azure web app's connection string is not set up correctly.
If you forget to rename the connection string name and save the configuration (as in steps 1.14 -1.17), you will see the following error when you reload the web app after running the release pipeline (in step 2.18).
===========================Begin Error page=================================
Runtime ErrorDescription: An application error occurred on the server. The current custom error settings for this application prevent the details of the application error from being viewed remotely (for security reasons). It could, however, be viewed by browsers running on the local server machine.
Details: To enable the details of this specific error message to be viewable on remote machines, please create a <customErrors> tag within a "web.config" configuration file located in the root directory of the current web application. This <customErrors> tag should then have its "mode" attribute set to "Off".
|
Notes: The current error page you are seeing can be replaced by a custom error page by modifying the "defaultRedirect" attribute of the application's <customErrors> configuration tag to point to a custom error page URL.
|
============================End Error page=================================
===========================Begin Error page=================================
Exception Details: System.ComponentModel.Win32Exception: The system cannot find the file specified
Source Error:
An unhandled exception was generated during the execution of the current web request. Information regarding the origin and location of the exception can be identified using the exception stack trace below. |
Stack Trace:
|
============================End Error page=================================


Comments
Post a Comment